 F12 Labs
 Aedify
Aedify documentation / Get started
Getting started with Aedify
Install Aedify, set up your theme in three clicks, and build and publish your first page with rows, columns, text, images and buttons.
This guide takes you from installing Aedify to a published page on your store. Along the way you'll set up your theme, learn your way around the builder, and see where product descriptions and templates fit in.
Before you start
- Your theme needs to support app blocks. That's every Online Store 2.0 theme. Aedify's live elements (products, collections and blog posts) are filled in by an app block in your page template.
- You need permission to install apps and to edit the theme. Setting up the theme takes three clicks in the theme editor.
- Everything you build is saved in Shopify. Pages and blog posts are regular Shopify pages and blog posts, and the layout is saved into their content. Your content isn't kept on Aedify's servers.
Install Aedify
- Open Aedify on the Shopify App Store and click Install.
- Shopify lists the permissions Aedify asks for. Review them and approve.
- Shopify opens Aedify in your admin. Next time, you'll find it under Apps in the admin sidebar.
What each permission is for:
| Permission | Why Aedify needs it |
|---|---|
| Online store pages | To create and save your pages and blog posts |
| Products | To show products in Products elements and to save product and collection descriptions |
| Metaobjects | To save your templates in your store, and the details Aedify keeps with each page |
| Files | To upload images to Shopify Files and use the ones already there |
When you first open Aedify, it adds a few definitions to your store so it can keep track of what it built: metafields in the aedify namespace on pages, blog posts, products and collections, and an Aedify template metaobject type. You'll see them under Settings → Custom data. They belong to your store.
Set up your theme
Shopify asks merchants to add app pieces to their theme themselves, so Aedify gives you a checklist with a button for each step. You'll find Storefront setup on Aedify's home page.
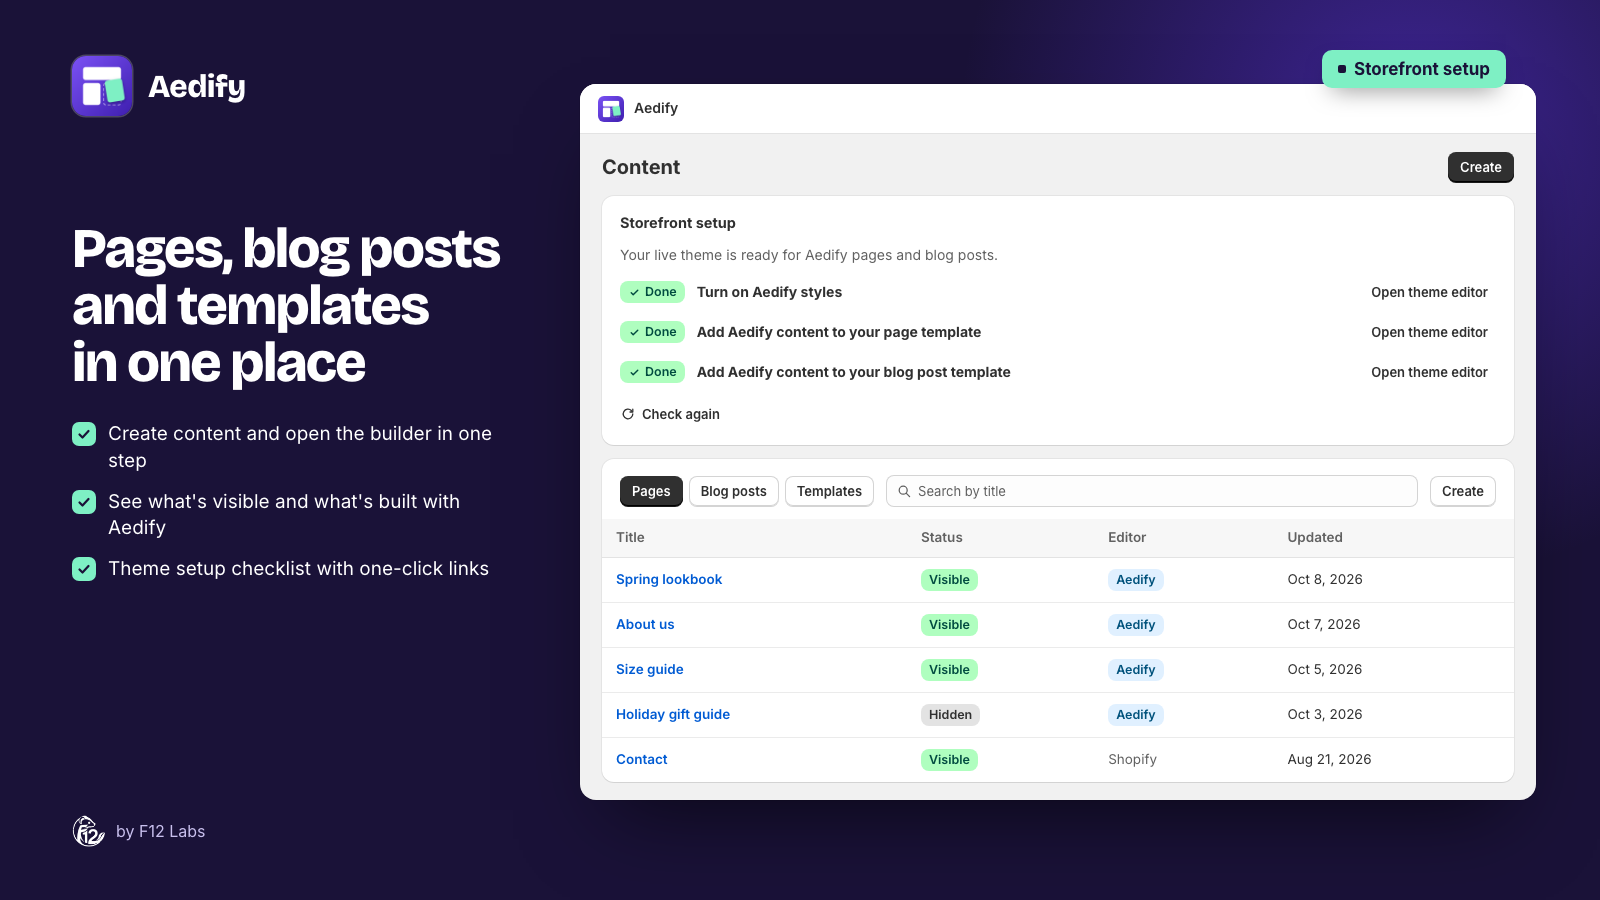
| Step | Button | What it does |
|---|---|---|
| Turn on Aedify styles | Turn on | Turns on the Aedify styles app embed, which makes Aedify layouts look right wherever your theme shows a page or blog post |
| Add Aedify content to your page template | Add block | Adds the Aedify content block to your page template. It's needed for live elements such as Products |
| Add Aedify content to your blog post template | Add block | The same for blog posts. Some themes only allow it below the post |
For each step:
- Click the button. The theme editor opens with the step ready.
- Click Save in the theme editor.
- Come back to Aedify. The step shows Done. If it doesn't, click Check again.
When all three are done, the checklist turns into a short "Your storefront is ready for Aedify" message.
Create your first page
- On Aedify's home page, click Create, or the Page card.
- Leave the type on Page and enter a Title, for example "About us".
- Click Create and open builder.
The page is created hidden, so you can build it before anyone can see it.
Find your way around the builder
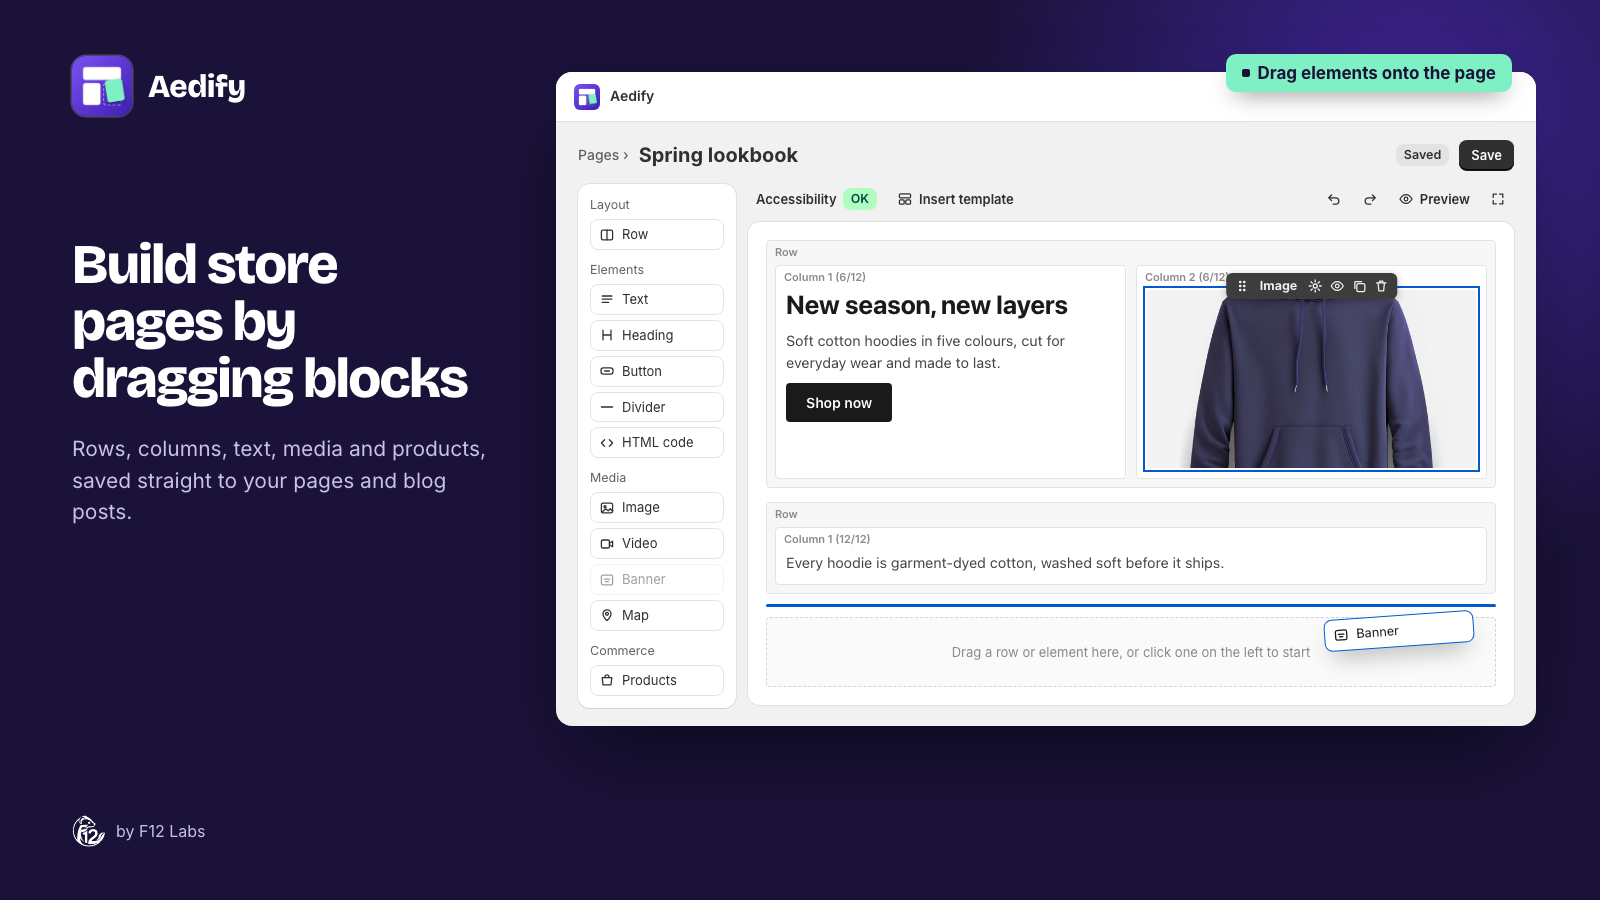
- The palette on the left holds everything you can add:
- Layout: Row, Template
- Elements: Text, Heading, Button, Icon, Divider, HTML code, Accordion, Tabs
- Media: Image, Video, Banner, Map
- Commerce: Products, Collections, Blog posts
- The canvas is your page. Drag an item from the palette onto it, or click an item to add it next to whatever is selected.
- Hover over an element for its toolbar: drag to move it, open Settings, hide it on the storefront, duplicate it or delete it.
- Click text or a heading to type straight into it.
- The toolbar above the canvas has the Accessibility check, Insert template, undo and redo, Preview (desktop, tablet and phone sizes), and full screen.
Keyboard shortcuts: Cmd/Ctrl+Z undoes, Shift+Cmd/Ctrl+Z redoes. With an element selected, Delete removes it and Alt+arrow keys move it. Using the builder covers every part of it in detail.
Build the page
Here's a simple two-column section: a heading, some text and a button on the left, and an image on the right.
- Drag a Row onto the canvas. A new row has two equal columns.
- Drag a Heading into the left column and type your heading.
- Drag a Text element under it and write a sentence or two.
- Drag a Button under the text. Click its Settings, change the Label, and use Browse next to Link to pick a product, collection or page.
- Drag an Image into the right column. In its settings, choose an image from Shopify Files or upload one, and fill in the Alt text, a short description for people using screen readers.
- Click Preview and check the page at phone size. Columns stack on phones automatically.
- Click Save.
To change how something looks, open its Settings. Every element also has a Style section, for spacing, colors and borders, and an Advanced section. Leave Style empty and the element takes your theme's styles.
Publish it
- Tick Visible on storefront at the top of the builder.
- Click Save.
The page is now live at its usual Shopify address (/pages/ followed by the page's handle). To put it in your store's menu, add it under Online Store → Navigation in Shopify, as you would any page.
Aedify's Pages list shows every page in your store, with an Aedify badge on the ones built in Aedify. Pages made in Shopify's own editor show Shopify. Open one in Aedify and you can keep its content as one HTML block or convert it into elements you can edit.
Design a product or collection description
Aedify works on product and collection descriptions too:
- From the product or collection in Shopify, open More actions and choose Design description in Aedify.
- Or open Descriptions in Aedify and click Choose product or Choose collection.
The builder works the same way. Aedify only changes the description. It never touches the product's title, price or status. If you use Products, Collections or Blog posts elements in a description, add the Aedify content block to your product or collection template too. The builder tells you when it's missing, with a link to add it.
Next steps
- Templates: save a set of rows once and place it on any page. Editing the template updates every page that uses it. Start from one of the 23 starter templates under Insert template.
- Live products: add a Products element and show a collection, products you pick, or products matching conditions such as a tag or price. Prices and stock come from your store whenever the page loads.
- Blog posts: create one from the home page. Pick a blog, or make a new one, and build the post the same way.
The Aedify page gives an overview of every element, templates and the accessibility check.